
Image Augmentation#
Notebook by:
Royi Avital RoyiAvital@fixelalgorithms.com
Revision History#
Version |
Date |
User |
Content / Changes |
|---|---|---|---|
1.0.000 |
01/06/2024 |
Royi Avital |
First version |
![]()
# Import Packages

# General Tools
import numpy as np
import scipy as sp
import pandas as pd

# Machine Learning

# Deep Learning
import torch
import torch.nn            as nn
from torch.utils.tensorboard import SummaryWriter
import torchinfo
import torchvision
from torchvision.transforms import v2 as TorchVisionTrns

# Image Processing & Computer Vision
import skimage as ski

# Miscellaneous
import math
import os
from platform import python_version
import random
import time

# Typing
from typing import Any, Callable, Dict, Generator, List, Optional, Self, Set, Tuple, Union

# Visualization
import matplotlib as mpl
import matplotlib.pyplot as plt
import seaborn as sns

# Jupyter
from IPython import get_ipython
from IPython.display import HTML, Image
from IPython.display import display
from ipywidgets import Dropdown, FloatSlider, interact, IntSlider, Layout, SelectionSlider
from ipywidgets import interact
Notations#
(?) Question to answer interactively.
(!) Simple task to add code for the notebook.
(@) Optional / Extra self practice.
(#) Note / Useful resource / Food for thought.
Code Notations:
someVar    = 2; #<! Notation for a variable
vVector    = np.random.rand(4) #<! Notation for 1D array
mMatrix    = np.random.rand(4, 3) #<! Notation for 2D array
tTensor    = np.random.rand(4, 3, 2, 3) #<! Notation for nD array (Tensor)
tuTuple    = (1, 2, 3) #<! Notation for a tuple
lList      = [1, 2, 3] #<! Notation for a list
dDict      = {1: 3, 2: 2, 3: 1} #<! Notation for a dictionary
oObj       = MyClass() #<! Notation for an object
dfData     = pd.DataFrame() #<! Notation for a data frame
dsData     = pd.Series() #<! Notation for a series
hObj       = plt.Axes() #<! Notation for an object / handler / function handler
Code Exercise#
Single line fill
vallToFill = ???
Multi Line to Fill (At least one)
# You need to start writing
????
Section to Fill
#===========================Fill This===========================#
# 1. Explanation about what to do.
# !! Remarks to follow / take under consideration.
mX = ???

???
#===============================================================#
# Configuration
# %matplotlib inline

seedNum = 512
np.random.seed(seedNum)
random.seed(seedNum)

# Matplotlib default color palette
lMatPltLibclr = ['#1f77b4', '#ff7f0e', '#2ca02c', '#d62728', '#9467bd', '#8c564b', '#e377c2', '#7f7f7f', '#bcbd22', '#17becf']
# sns.set_theme() #>! Apply SeaBorn theme

runInGoogleColab = 'google.colab' in str(get_ipython())

# Improve performance by benchmarking
torch.backends.cudnn.benchmark = True

# Reproducibility (Per PyTorch Version on the same device)
# torch.manual_seed(seedNum)
# torch.backends.cudnn.deterministic = True
# torch.backends.cudnn.benchmark     = False #<! Makes things slower
# Constants

FIG_SIZE_DEF    = (8, 8)
ELM_SIZE_DEF    = 50
CLASS_COLOR     = ('b', 'r')
EDGE_COLOR      = 'k'
MARKER_SIZE_DEF = 10
LINE_WIDTH_DEF  = 2

DATA_FOLDER_PATH    = 'Data'
TENSOR_BOARD_BASE   = 'TB'
# Download Auxiliary Modules for Google Colab
if runInGoogleColab:
    !wget https://raw.githubusercontent.com/FixelAlgorithmsTeam/FixelCourses/master/AIProgram/2024_02/DataManipulation.py
    !wget https://raw.githubusercontent.com/FixelAlgorithmsTeam/FixelCourses/master/AIProgram/2024_02/DataVisualization.py
    !wget https://raw.githubusercontent.com/FixelAlgorithmsTeam/FixelCourses/master/AIProgram/2024_02/DeepLearningPyTorch.py
# Courses Packages
import sys
sys.path.append('../../utils')
from DataVisualization import PlotLabelsHistogram, PlotMnistImages
from DeepLearningPyTorch import NNMode
from DeepLearningPyTorch import RunEpoch
# General Auxiliary Functions

def PlotTransform( lImages: List[torchvision.tv_tensors._image.Image], titleStr: str, bAxis = False ) -> plt.Figure:

    numImg = len(lImages)
    axWidh = 3

    lWidth  = [lImages[ii].shape[-1] for ii in range(numImg)]
    hF, _ = plt.subplots(nrows = 1, ncols = numImg, figsize = (numImg * axWidh, 5), gridspec_kw = {'width_ratios': lWidth})
    for ii, hA in enumerate(hF.axes):
        mI = torch.permute(lImages[ii], (1, 2, 0))
        hA.imshow(mI, cmap = 'gray')
        hA.set_title(f'{ii}')
        hA.axis('on') if bAxis else hA.axis('off')

    hF.suptitle(titleStr)

    return hF
Image Augmentation#
Applying Image Augmentation expands the data available to the model to train on.
As more data, it also serves as a regularization.
This notebooks presents:
The
torchvision.transformsmodule.Applying some of the available transforms on an image.
Chaining transforms.
Creating a custom transform.
This notebook augments only the image data.
(#) Augmentation can be thought as the set of operation the model should be insensitive to.
For instance, if it should be insensitive to shift, the same image should be trained on with different shifts.(#) PyTorch Vision is migrating its transforms module from
v1tov2.
This notebook will focus onv2.(#) While the notebook shows image augmentation in the context of Deep Learning for Computer Vision, the Data Augmentation concept can be utilized for other tasks as well.
For instance, for Audio Processing on could apply some noise addition, pitch change, filters, etc…(#) The are packages which specialize on image data augmentation: Kornia, Albumentations (Considered to be the fastest), ImgAug (Deprecated), AugLy (Audio, image, text and video).
# Parameters

# Data
imgFileUrl = r'https://raw.githubusercontent.com/FixelAlgorithmsTeam/FixelCourses/master/DeepLearningMethods/09_TipsAndTricks/img1.jpg'

# Model

# Training

# Visualization
Generate / Load Data#
# Load Data

mI = ski.io.imread(imgFileUrl)

# Image Dimensions
print(f'Image Dimensions: {mI.shape[:2]}')
print(f'Image Number of Channels: {mI.shape[2]}')
print(f'Image Element Type: {mI.dtype}')
Image Dimensions: (450, 300)
Image Number of Channels: 3
Image Element Type: uint8
(#) The image is a NumPy array. PyTorch default image loader is using
PIL(Pillow, as its optimized version) where the image is the PIL class.
Plot the Data#
# Plot the Data

hF, hA = plt.subplots(figsize = (4, 6))

hA.imshow(mI)
hA.tick_params(axis = 'both', left = False, top = False, right = False, bottom = False,
               labelleft = False, labeltop = False, labelright = False, labelbottom = False)
hA.grid(False)
hA.set_title('Input Image');

Image Transforms#
This section shows several transforms available in PyTorch Vision.
(#) See TorchVision tutorials: Getting Started with Transforms v2, Illustration of Transforms.
(#) There are 2 API’s for the transforms. The class and the function (
FunctionalAPI).
Image to Tensor#
In v2 the transform ToTensor is replaced by ToImage and / or ToDtype.
(#) TorchVision has it own image container:
torchvision.tv_tensors.Image.
# Using `ToImage`

oToImg = TorchVisionTrns.ToImage() #<! Converts to TorchVision's Image
tI = oToImg(mI) #<! Does not scale or change type

print(f'Tensor Type: {type(tI)}')
print(f'Tensor Dimensions: {tI.shape}')
print(f'Image Element Type: {tI.dtype}')
Tensor Type: <class 'torchvision.tv_tensors._image.Image'>
Tensor Dimensions: torch.Size([3, 450, 300])
Image Element Type: torch.uint8
# Using `ToDtype`

oToDtype = TorchVisionTrns.ToDtype(dtype = torch.float32, scale = True) #<! Converts to TorchVision's Image
tIF = oToDtype(mI) #<! Does not scale or change type

# Won't have affect unless the input is `tv_tensors`
print(f'Tensor Type: {type(tIF)}')
print(f'Tensor Dimensions: {tIF.shape}')
print(f'Image Element Type: {tIF.dtype}')
Tensor Type: <class 'numpy.ndarray'>
Tensor Dimensions: (450, 300, 3)
Image Element Type: uint8
# Using `ToDtype`

oToImg = TorchVisionTrns.Compose([
    TorchVisionTrns.ToImage(),
    TorchVisionTrns.ToDtype(dtype = torch.float32, scale = True),
])

tIF = oToImg(mI)

print(f'Tensor Type: {type(tIF)}')
print(f'Tensor Dimensions: {tIF.shape}')
print(f'Image Element Type: {tIF.dtype}')
print(f'Image Minimum Value: {torch.min(tIF)}')
print(f'Image Maximum Value: {torch.max(tIF)}')
Tensor Type: <class 'torchvision.tv_tensors._image.Image'>
Tensor Dimensions: torch.Size([3, 450, 300])
Image Element Type: torch.float32
Image Minimum Value: 0.0
Image Maximum Value: 1.0
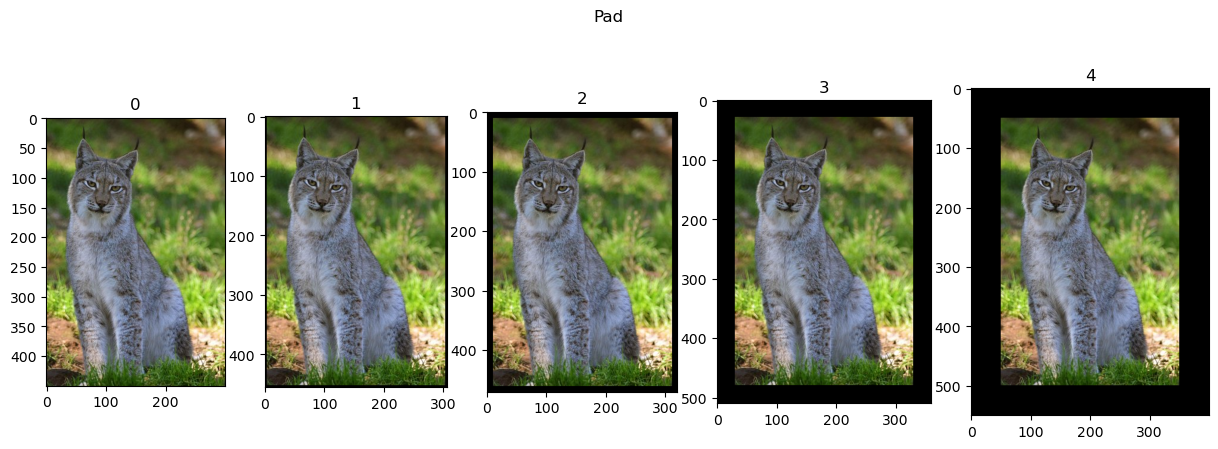
Pad Image#
Pads the image to enlarge its size.
Could be used to equate size of a set of images, though better be done with CenterCrop.
# Pad
# Works on `uint8` types which are faster!
lTrnImg = [tI] + [TorchVisionTrns.Pad(padding = padSize)(tI) for padSize in (3, 10, 30, 50)]
hF = PlotTransform(lTrnImg, 'Pad', True)
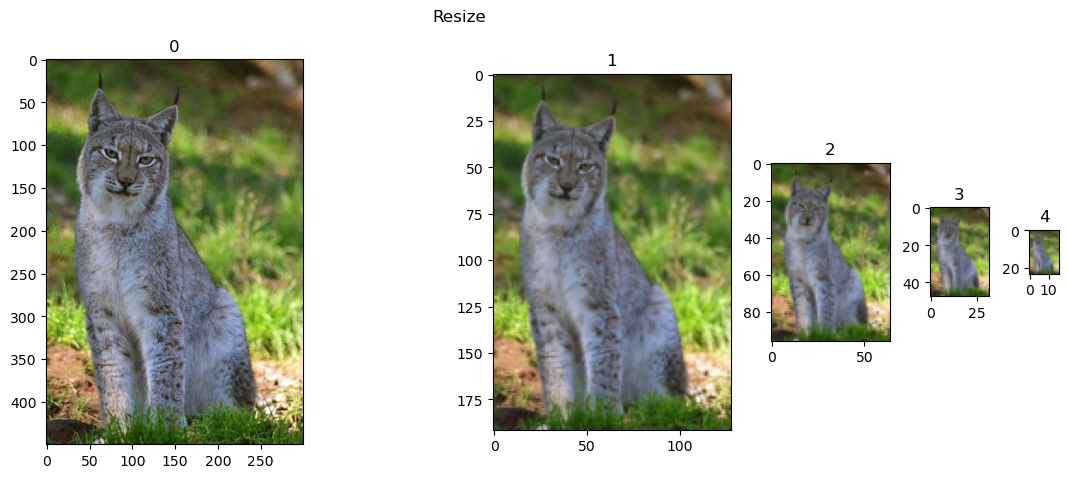
Resize#
Resizing allows handling a data set with different dimensions or adjust complexity. It also can assist making the model multi scaled as it has to have the same result for different sizes.
It can resize to a fixed size (May change the aspect ratio) or fixed minimum size.
# Resize
# Works on `uint8` types which are faster!
lTrnImg = [tI] + [TorchVisionTrns.Resize(size = imgSize)(tI) for imgSize in (128, 64, 32, 16)]
hF = PlotTransform(lTrnImg, 'Resize', True)
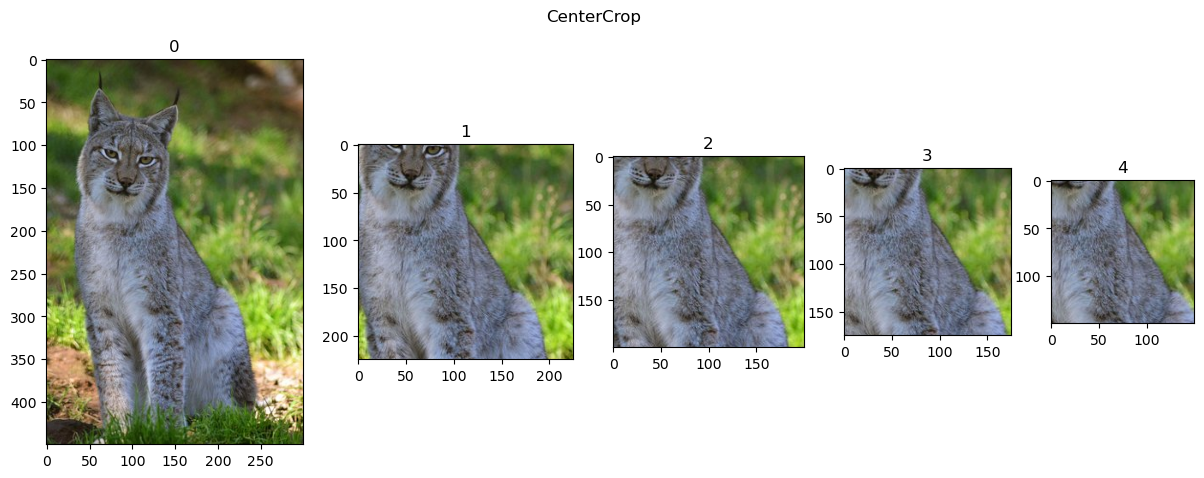
Center Crop#
Effective way to normalize the image size.
It ensures the output size. So smaller images are padded.
See also RandomCrop.
# Center Crop
# Works on `Float32` types which are slower
lTrnImg = [tIF] + [TorchVisionTrns.CenterCrop(size = imgSize)(tIF) for imgSize in (225, 200, 175, 150)]
hF = PlotTransform(lTrnImg, 'CenterCrop', True)
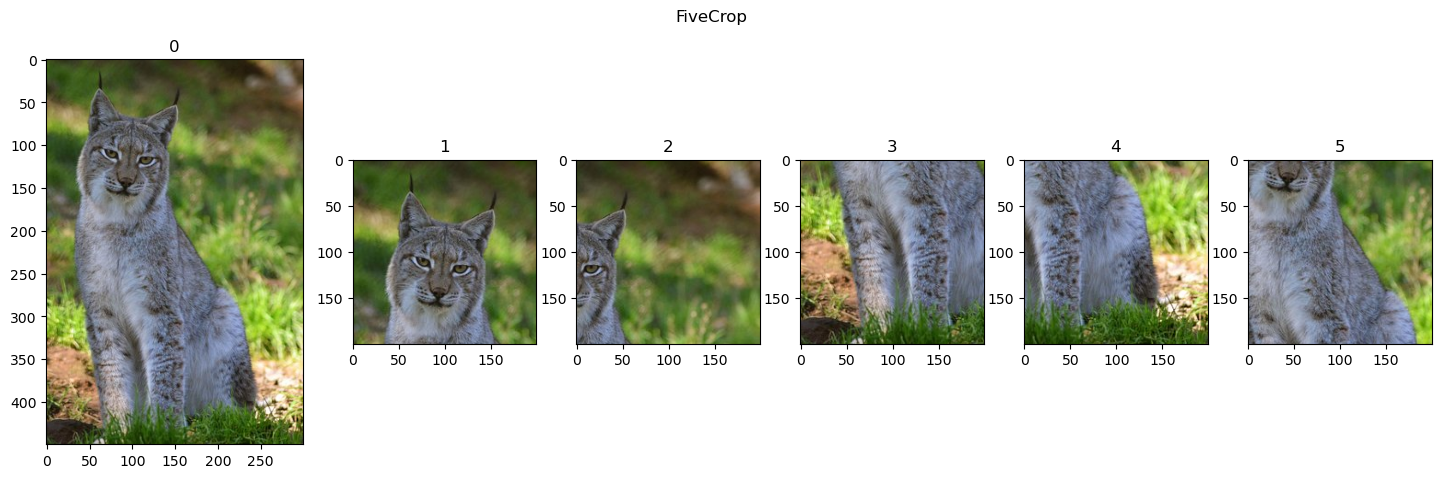
Five Crops#
Generates fixe crops of the image: 4 corners and center.
# Five Crop
# Works on `Float32` types which are slower
lTrnImg = [tIF] + list(TorchVisionTrns.FiveCrop(size = 200)(tIF))
hF = PlotTransform(lTrnImg, 'FiveCrop', True)
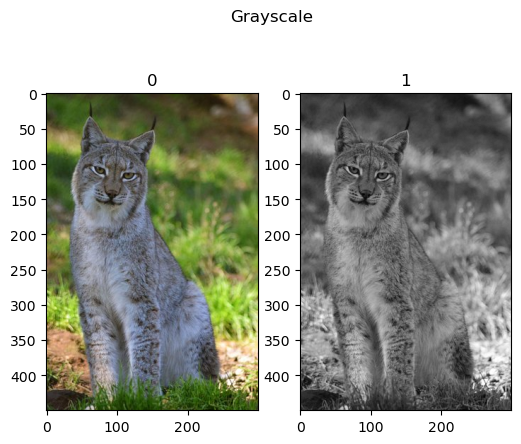
Grayscale#
In order to make the model insensitive to color, one could convert images into grayscale.
For compatibility, it allows setting the number of output channels.
# Grayscale
# Works on `uint8` types which are faster!
lTrnImg = [tI] + [TorchVisionTrns.Grayscale(num_output_channels = 1)(tI)]
hF = PlotTransform(lTrnImg, 'Grayscale', True)
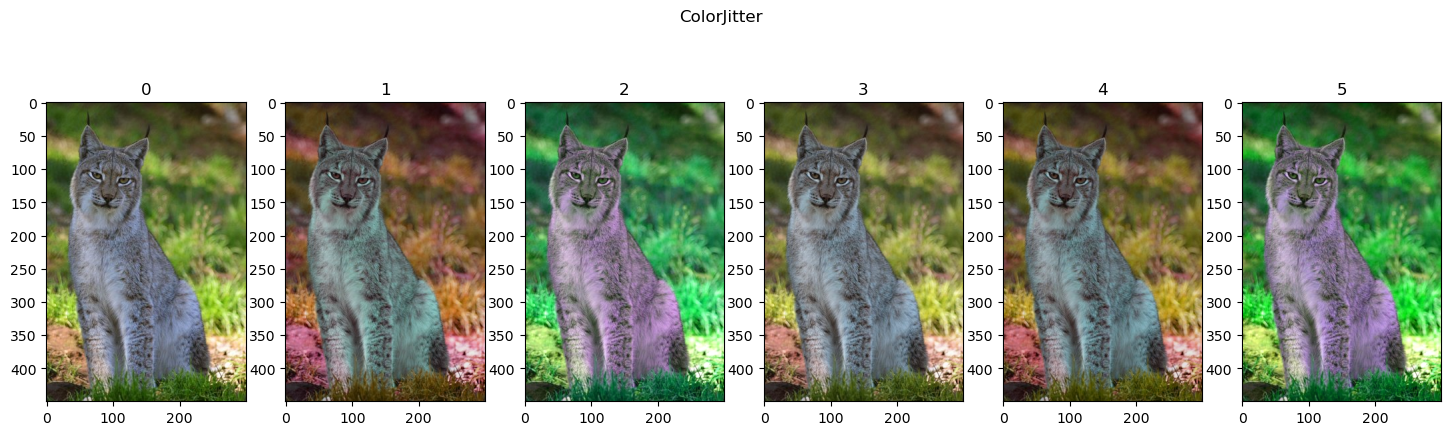
Color Jitter#
Another way to make the model less sensitive to color, or at least color accuracy, is by changing its color randomly.
The ColorJitter transform randomly changes the brightness, saturation and other properties of an image to achieve that.
There are options to alter the channels (RandomChannelPermutation) and combine them (RandomPhotometricDistort).
# ColorJitter
# Works on `uint8` types which are faster!
lTrnImg = [tI] + [TorchVisionTrns.ColorJitter(brightness = 0.25, saturation = 0.25, hue = 0.25)(tI) for _ in range(5)]
hF = PlotTransform(lTrnImg, 'ColorJitter', True)
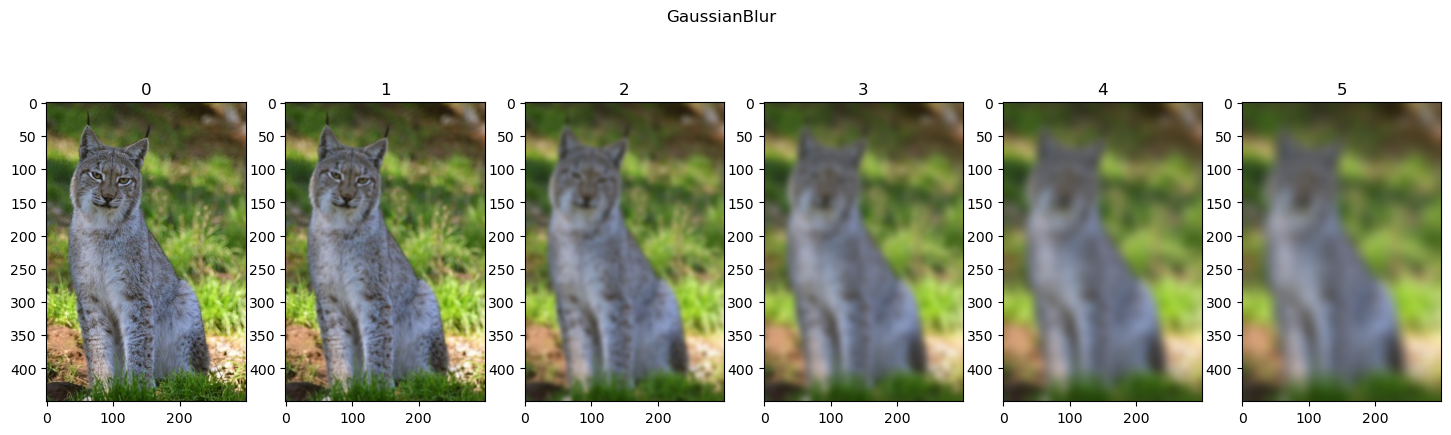
Gaussian Blur#
Blurring the image removes details and also, to some degree, have scaling effect.
Hence it can be used to add robustness.
# GaussianBlur
# Works on `uint8` types which are faster!
lTrnImg = [tI] + [TorchVisionTrns.GaussianBlur(kernel_size = (31, 31), sigma = (ii))(tI) for ii in range(1, 11, 2)]
hF = PlotTransform(lTrnImg, 'GaussianBlur', True)
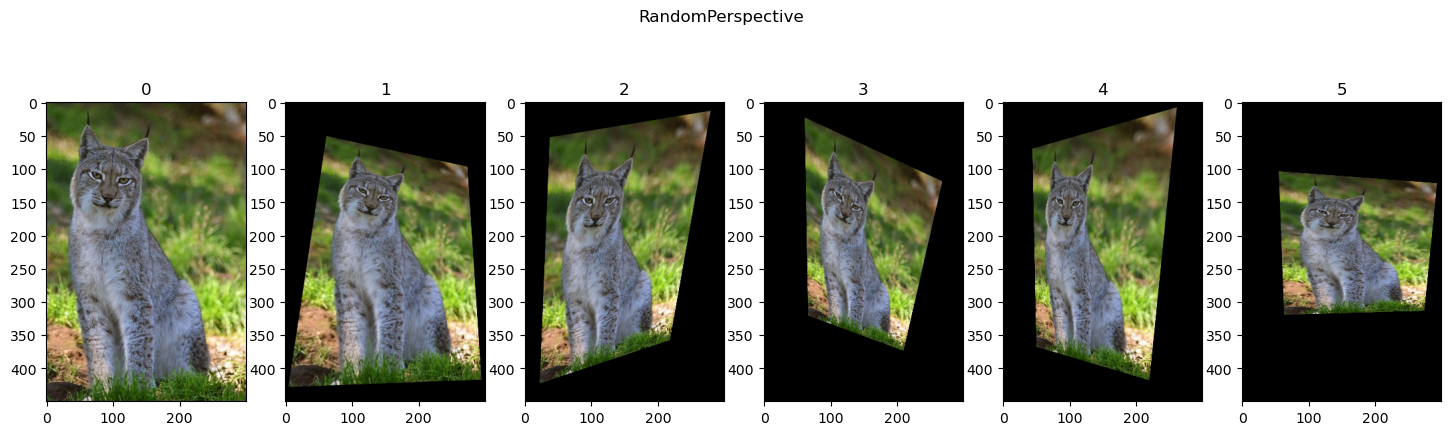
Random Perspective#
Applies a transformation on the image coordinates.
# RandomPerspective
# Works on `uint8` types which are faster!
lTrnImg = [tI] + [TorchVisionTrns.RandomPerspective(distortion_scale = 0.6, p = 1.0)(tI) for _ in range(5)]
hF = PlotTransform(lTrnImg, 'RandomPerspective', True)
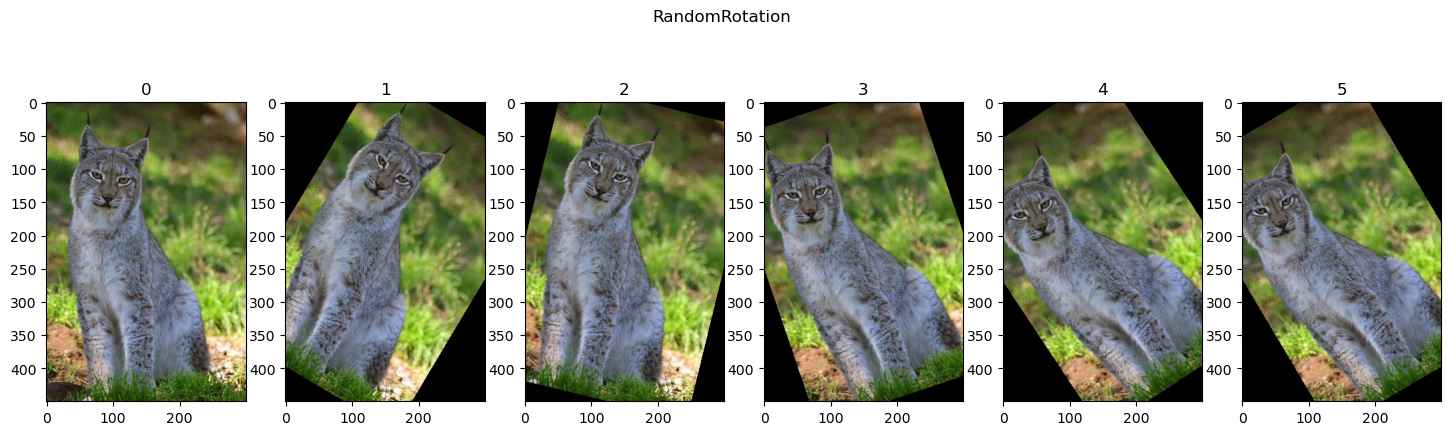
Random Rotation#
A specific case of perspective distortion is rotation.
# RandomRotation
# Works on `uint8` types which are faster!
lTrnImg = [tI] + [TorchVisionTrns.RandomRotation(degrees = (-45, 45))(tI) for _ in range(5)]
hF = PlotTransform(lTrnImg, 'RandomRotation', True)
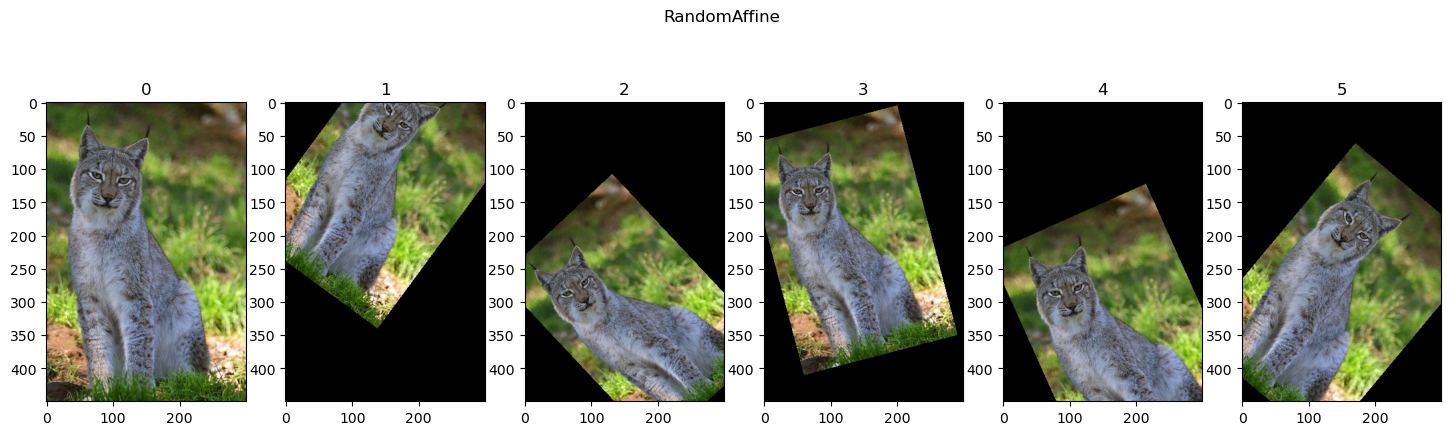
Random Affine#
Applies affine transformation on the image coordinates.
# RandomAffine
# Works on `uint8` types which are faster!
lTrnImg = [tI] + [TorchVisionTrns.RandomAffine(degrees = (-45, 45), translate = (0.1, 0.3), scale = (0.75, 0.95))(tI) for _ in range(5)]
hF = PlotTransform(lTrnImg, 'RandomAffine', True)
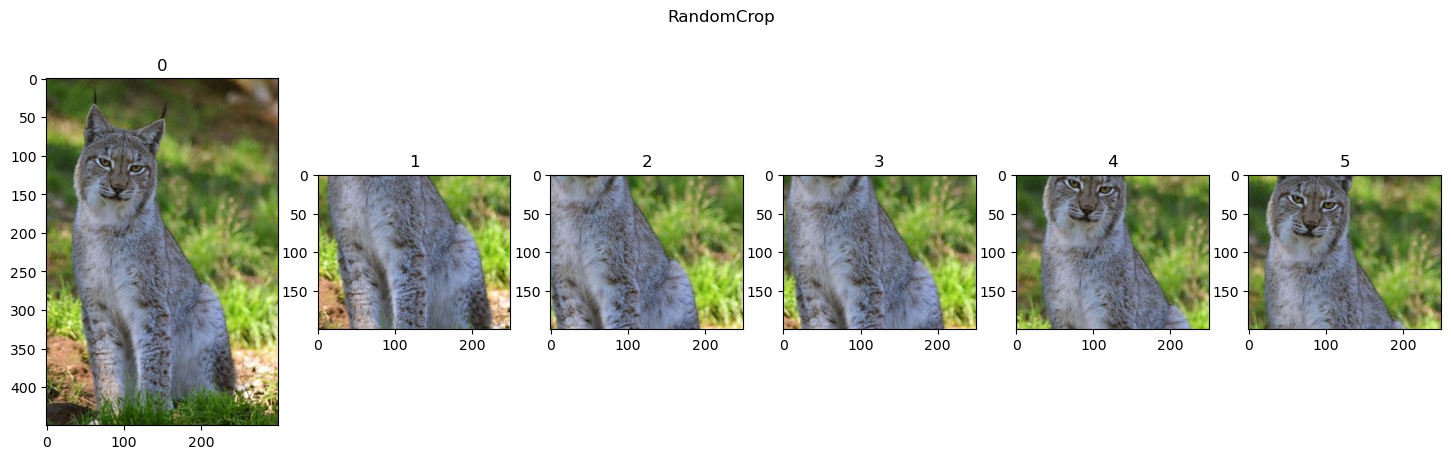
Random Crop#
Applies a crop with a random location.
# RandomCrop
# Works on `uint8` types which are faster!
lTrnImg = [tI] + [TorchVisionTrns.RandomCrop(size = (200, 250))(tI) for _ in range(5)]
hF = PlotTransform(lTrnImg, 'RandomCrop', True)
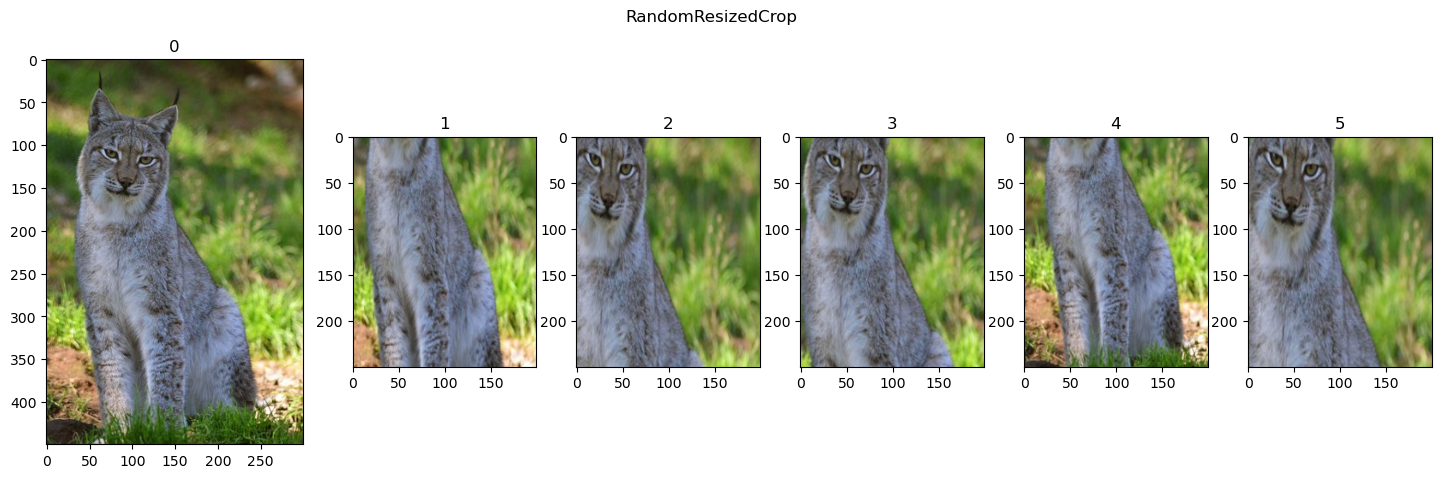
Random Crop and Resize#
Allows insensitive to partial view, shift (Random crop location) and scale.
# RandomResizedCrop
# Works on `uint8` types which are faster!
lTrnImg = [tI] + [TorchVisionTrns.RandomResizedCrop(size = (250, 200), scale = (0.25, 1.25))(tI) for _ in range(5)]
hF = PlotTransform(lTrnImg, 'RandomResizedCrop', True)
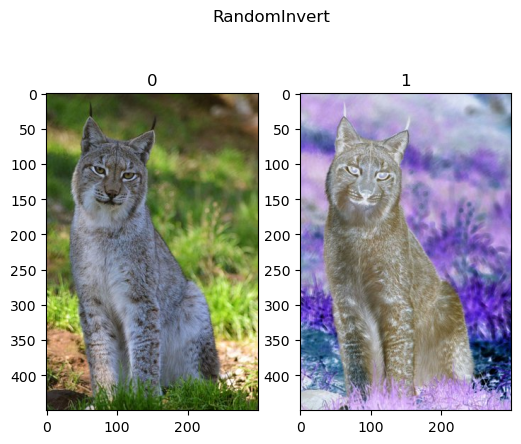
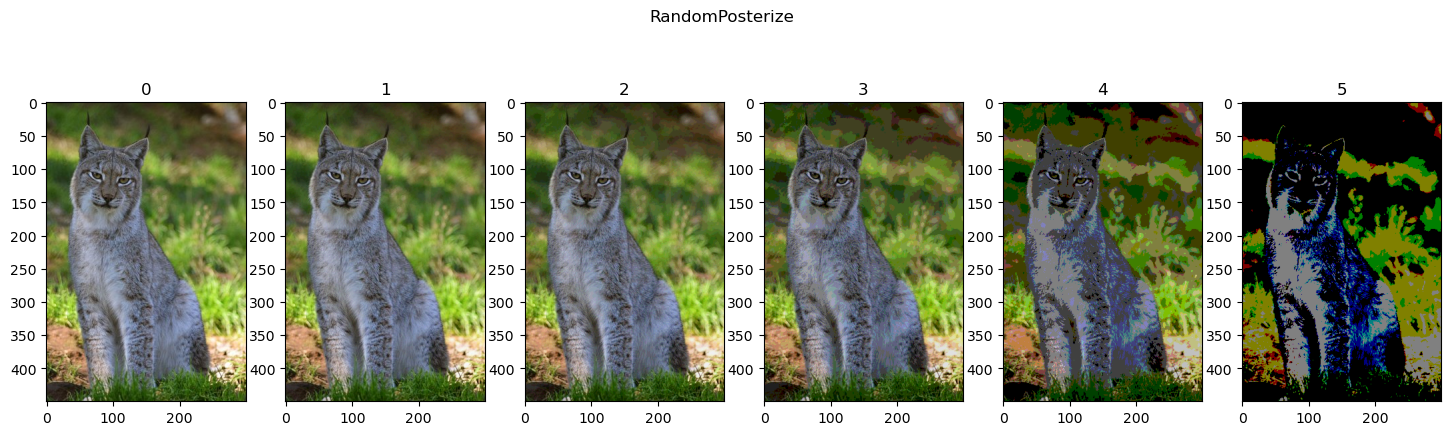
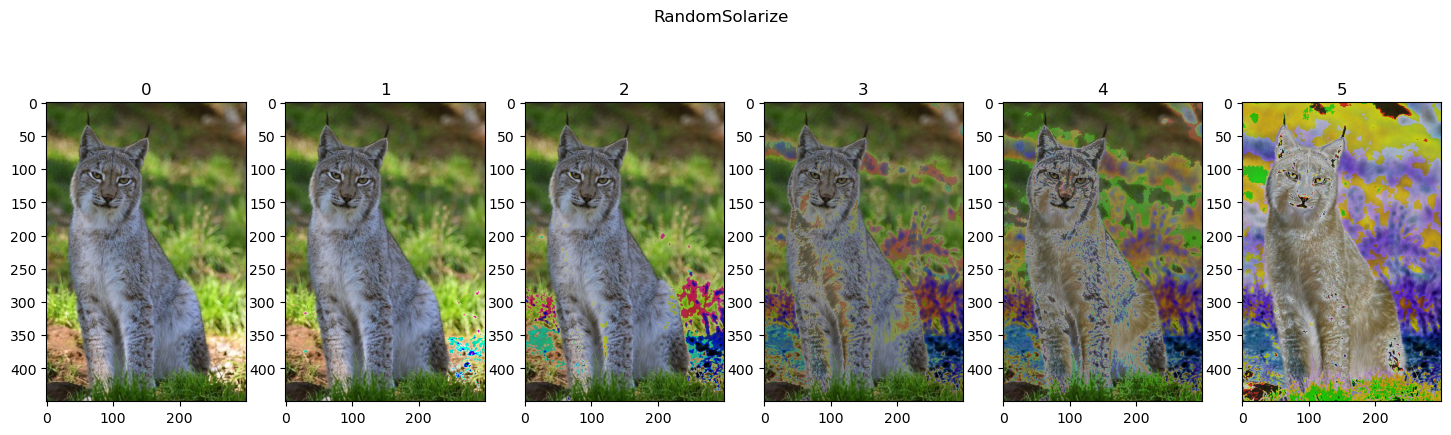
Random Invert, Posterize and Solarize#
Color effects: Invert the image, reduce the number of effective bits and selective inversion.
# RandomInvert
# Works on `uint8` types which are faster!
lTrnImg = [tI] + [TorchVisionTrns.RandomInvert(p = 1)(tI) for _ in range(1)]
hF = PlotTransform(lTrnImg, 'RandomInvert', True)
# RandomPosterize
# Works on `uint8` types which are faster!
lTrnImg = [tI] + [TorchVisionTrns.RandomPosterize(bits = ii, p = 1.0)(tI) for ii in reversed(range(1, 6))]
hF = PlotTransform(lTrnImg, 'RandomPosterize', True)
# RandomSolarize
# Works on `uint8` types which are faster!
lTrnImg = [tI] + [TorchVisionTrns.RandomSolarize(threshold = ii, p = 1.0)(tI) for ii in [250, 200, 150, 100, 50]]
hF = PlotTransform(lTrnImg, 'RandomSolarize', True)
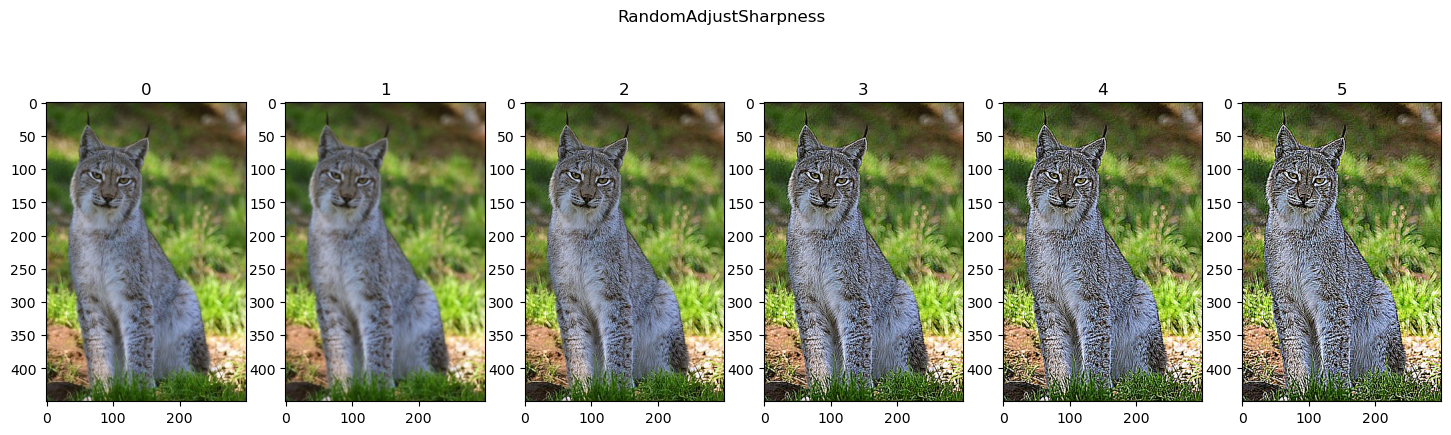
Random Sharpness Adjustment#
Changes the sharpness of the image. Basically using Unsharp Mask like effect.
# RandomAdjustSharpness
# Works on `uint8` types which are faster!
lTrnImg = [tI] + [TorchVisionTrns.RandomAdjustSharpness(sharpness_factor = ii, p = 1.0)(tI) for ii in range(0, 20, 4)]
hF = PlotTransform(lTrnImg, 'RandomAdjustSharpness', True)
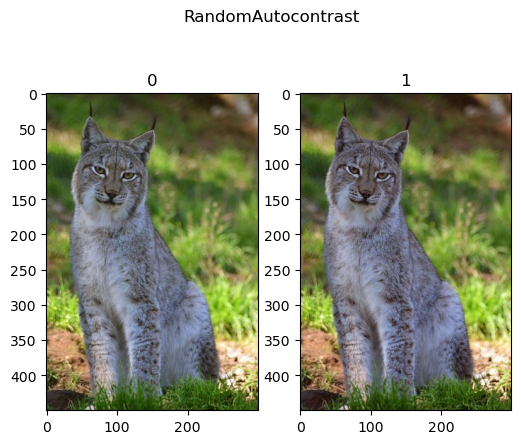
Random Auto Contrast#
Applies auto contrast effect to the image.
# RandomAutocontrast
# Works on `uint8` types which are faster!
lTrnImg = [tI] + [TorchVisionTrns.RandomAutocontrast(p = 1.0)(tI) for _ in range(1)]
hF = PlotTransform(lTrnImg, 'RandomAutocontrast', True)
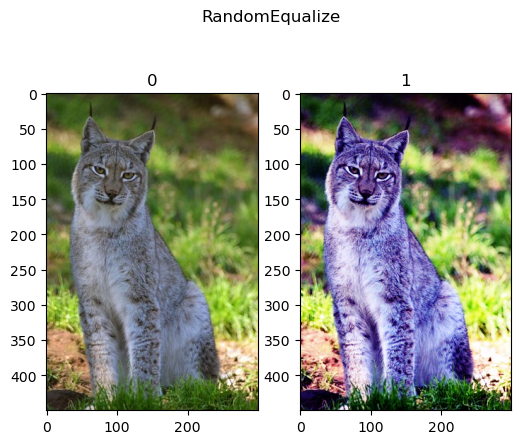
Random Equalize#
Applies histogram equalization effect to the image.
# RandomEqualize
# Works on `uint8` types which are faster!
lTrnImg = [tI] + [TorchVisionTrns.RandomEqualize(p = 1.0)(tI) for _ in range(1)]
hF = PlotTransform(lTrnImg, 'RandomEqualize', True)
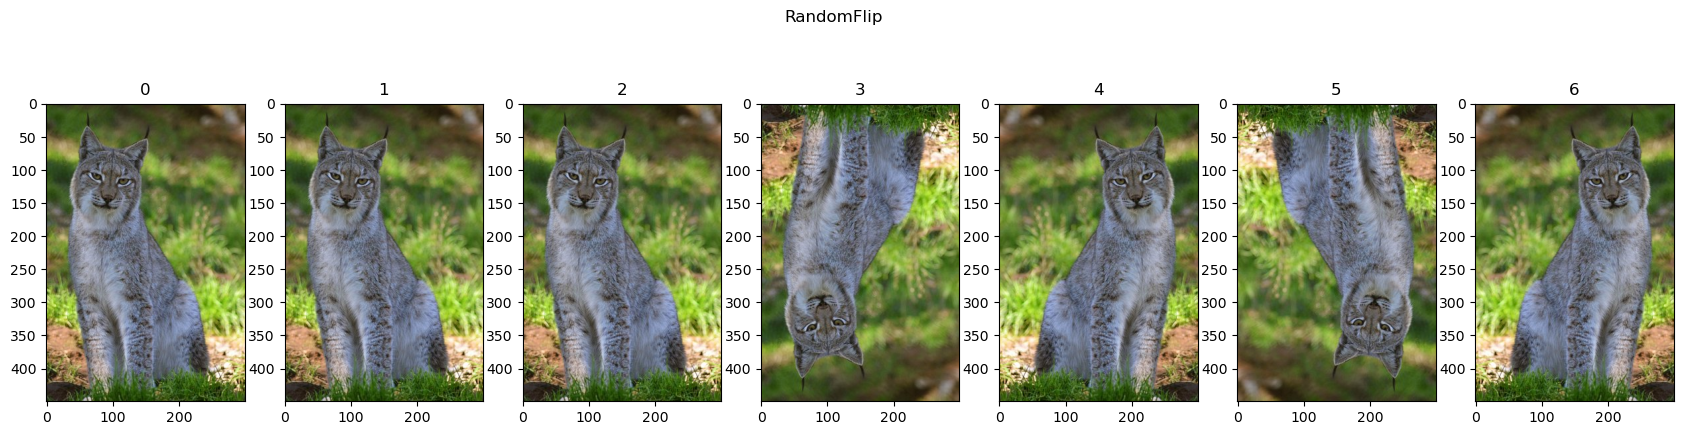
Random Vertical / Horizontal Flips#
# Random Flip

oTran = TorchVisionTrns.Compose([
    TorchVisionTrns.RandomHorizontalFlip(p = 0.5),
    TorchVisionTrns.RandomVerticalFlip(p = 0.5),
])

lTrnImg = [tI] + [oTran(tI) for _ in range(6)]
hF = PlotTransform(lTrnImg, 'RandomFlip', True)
(?) Can it be used for the MNIST data set?
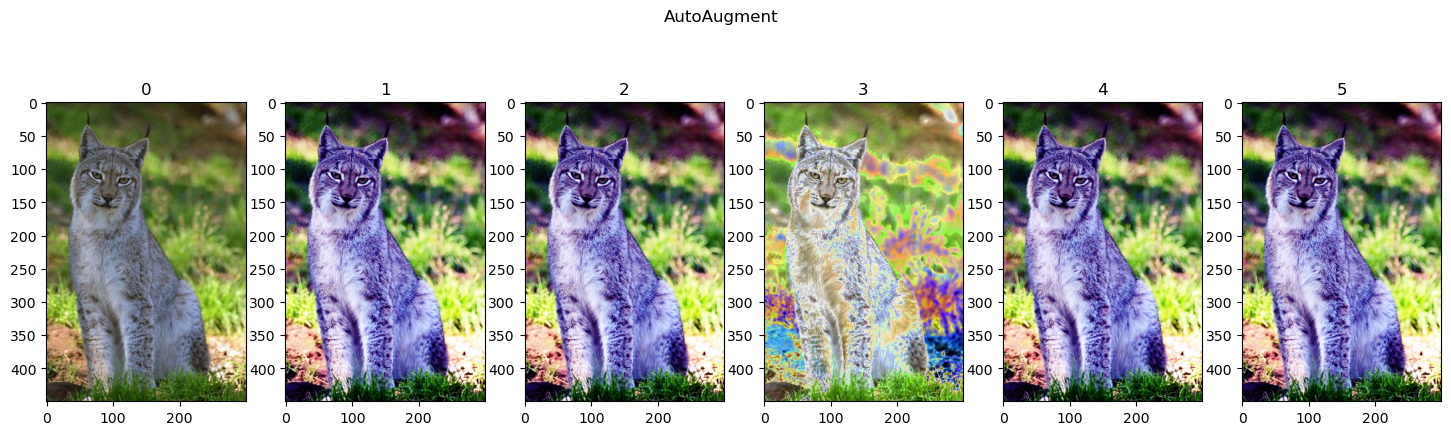
Auto Augmentation#
Applies several combination according to a policy.
(#) In order to see the operations applied, have a look at the code linked at
AutoAugmentPolicy.
# AutoAugment
# Works on `uint8` types which are faster!
lTrnImg = [tI] + [TorchVisionTrns.AutoAugment(policy = torchvision.transforms.AutoAugmentPolicy.IMAGENET)(tI) for _ in range(5)]
hF = PlotTransform(lTrnImg, 'AutoAugment', True)
(!) Use
Lambdato generate a custom transformation.